我們完成MySQL資料庫的初步建置後,接著是安裝MySQL Connector C++ 1.0.5
安裝完成後,在MySQL資料庫目錄下應該會多一個目錄
C:\Program Files\MySQL\MySQL Connector C++ 1.0.5
待會會用到,先記著。
首先,建立一個簡單的專案
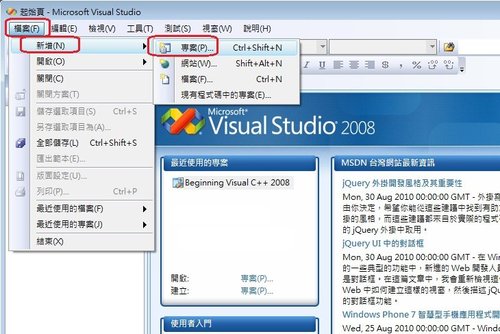
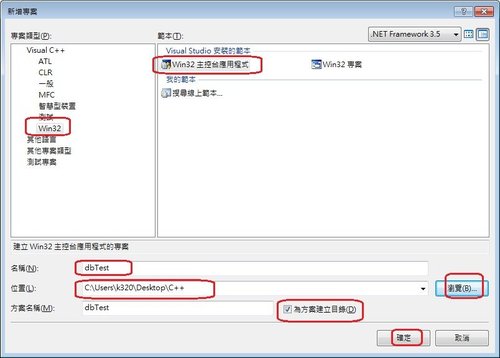
選項如下
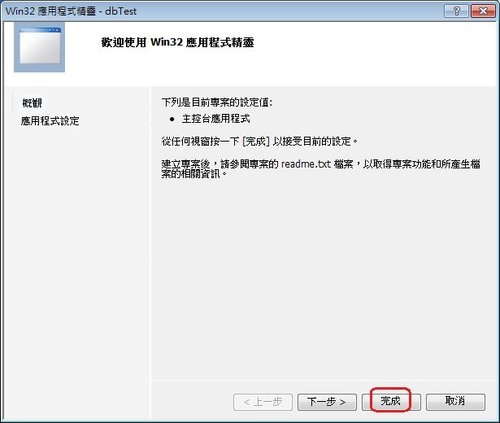
直接按完成
完成後如下圖所示
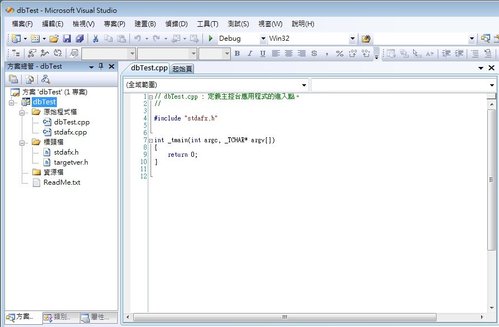
把下列程式碼複製過去,
注意:下面的#include <xxxx>符號秀出不來,我用全形符號代替
-------------------------------------------------------------------------
// dbTest.cpp : 定義主控台應用程式的進入點。
//
#include "stdafx.h"
#include <iostream>
#include <mysql_connection.h>
#include <mysql_driver.h>
#include <cppconn/driver.h>
#include <cppconn/exception.h>
#include <cppconn/statement.h>
using namespace std;
using namespace sql;
#define DBHOST "tcp://localhost:3306"
#define USER "abc"
#define PASSWORD "123"
#define DATABASE "test"
int _tmain(int argc, _TCHAR* argv[])
{
const string url(DBHOST);
const string user(USER);
const string password(PASSWORD);
const string database(DATABASE);
string sql;
Driver *driver;
Connection *con;
Statement *stmt;
ResultSet *res;
try{
driver = get_driver_instance();
con = driver -> connect(url, user, password);
con -> setSchema(database);
stmt = con -> createStatement();
sql="select * from news;";
res = stmt->executeQuery(sql);
cout<<"列印紀錄...\n";
while(res->next()){
cout << res->getInt("akey") << " " << res->getString("day") << " "<< res->getString("title") << " " << res->getString("content") +"\n";
}
}catch(SQLException &e){
cout<
}
delete res;
delete stmt;
delete con;
cout<<"釋放物件 res,stmt,con\n";
system("pause");
return 0;
}
-------------------------------------------------------------------------
此刻編譯一定會出現一堆錯誤的,不用急,慢慢來設定環境屬性
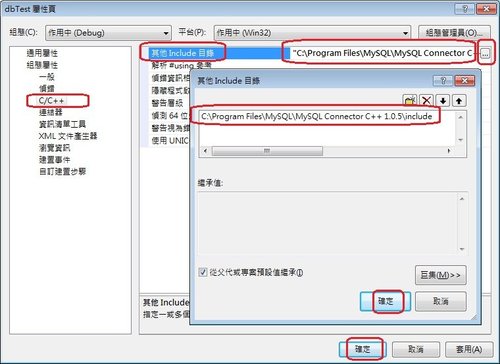
在專案名稱按右鍵,選屬性,依下圖選取並設定。
先設定Include目錄,指向 MySQL Connector 下的 include
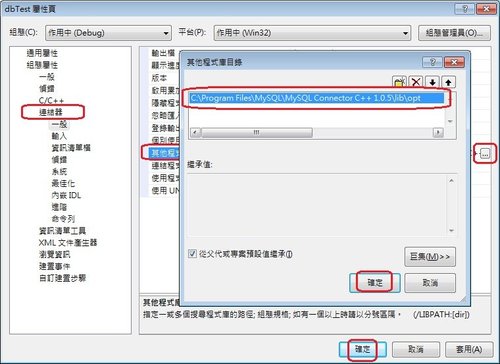
再來是設定 lib,指向 MySQL Connector C++ 1.0.5\lib\opt 目錄
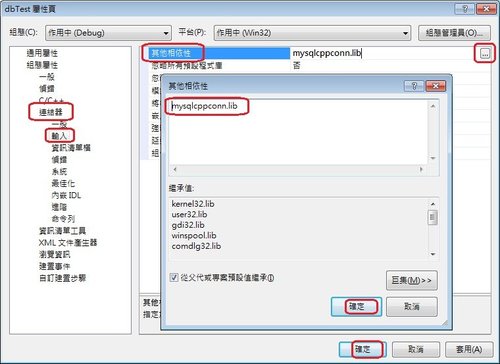
再來是指定相依 lib,輸入 mysqlcppconn.lib
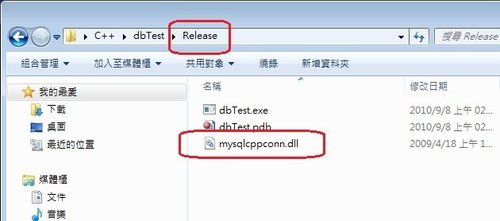
最後是copy runtime 元件到專案路徑去,此處是 dbTest\Release
這樣就可以連線 MySQL 了,迫不及待要看看執行畫面吧!
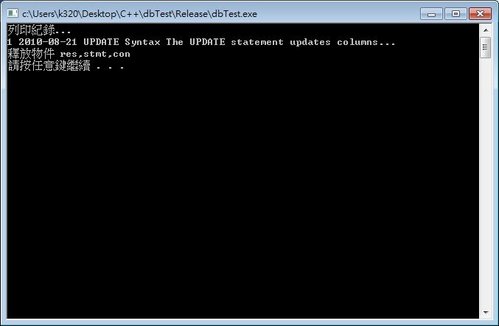
成功讀出紀錄了^^
接著測試另一種連線方式,採用 std::map 來連線
先建立專案 dbTest1,直接右鍵新增
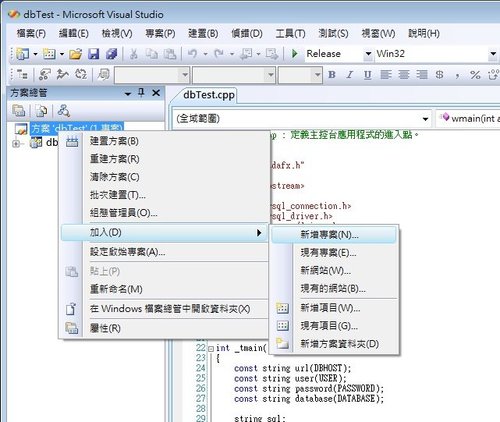
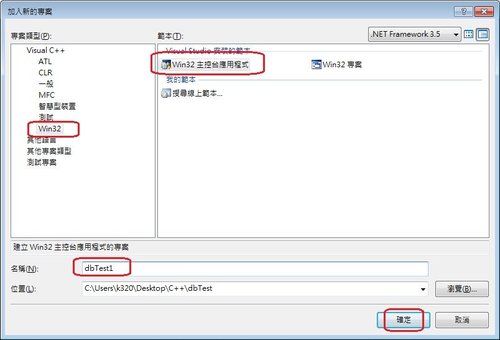
跟剛剛一樣的步驟,輸入 dbTest1,當然,名稱是隨你高興。
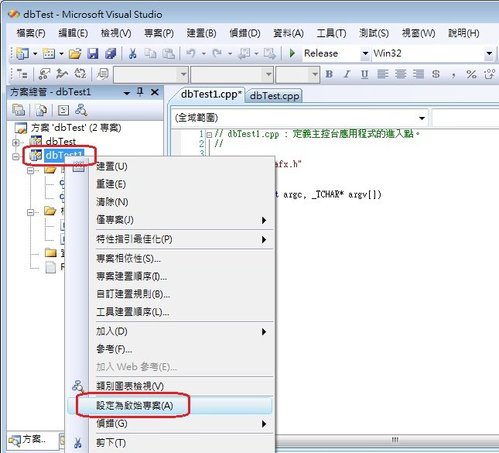
然後設定為起始專案
複製下列程式碼來測試
// dbTest1.cpp : 定義主控台應用程式的進入點。
//
#include "stdafx.h"
#include <iostream>
#include <mysql_connection.h>
#include <mysql_driver.h>
#include <cppconn/driver.h>
#include <cppconn/exception.h>
#include <cppconn/statement.h>
using namespace std;
using namespace sql;
int _tmain(int argc, _TCHAR* argv[])
{
std::map conProperties;
ConnectPropertyVal val;
val.str.val = "tcp://127.0.0.1:3306";
conProperties[std::string("hostName")] = val;
val.str.val = "abc";
conProperties[std::string("userName")] = val;
val.str.val = "123";
conProperties[std::string("password")] = val;
val.str.val = "test";
conProperties[std::string("schema")] = val;
string sql;
Driver *driver;
Connection *con;
Statement *stmt;
ResultSet *res;
try{
driver = get_driver_instance();
con = driver -> connect(conProperties);
stmt = con -> createStatement();
sql="select * from news;";
res = stmt->executeQuery(sql);
cout<<"使用std::map來連線,列印紀錄...\n";
while(res->next()){
cout << res->getInt("akey") << " " << res->getString("day") << " "<< res->getString("title") << " " << res->getString("content") +"\n";
}
}catch(SQLException &e){
cout<
}
delete res;
delete stmt;
delete con;
cout<<"釋放物件 res,stmt,con\n";
system("pause");
return 0;
}
這個程式碼不同於上例的地方,用紅色表示,這裡的方法是參考自JGood:
http://blog.csdn.net/JGood/archive/2010/06/10/5661339.aspx
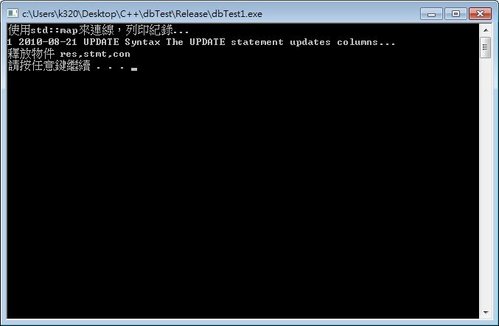
按下執行,畫面如下。
[註] Connector C++ 1.0.5 中的變數名稱如下:
可以這樣去設定使用.
con->setClientOption("OPT_CHARSET_NAME","utf8");
hostName,userName,password,metadataUseInfoSchema,port,socket,pipe,schema,
CLIENT_COMPRESS,CLIENT_FOUND_ROWS,CLIENT_IGNORE_SIGPIPE,
CLIENT_IGNORE_SPACE,CLIENT_INTERACTIVE,CLIENT_LOCAL_FILES,
CLIENT_MULTI_RESULTS,CLIENT_MULTI_STATEMENTS,CLIENT_NO_SCHEMA,
OPT_CONNECT_TIMEOUT,OPT_READ_TIMEOUT,OPT_WRITE_TIMEOUT,
OPT_RECONNECT, OPT_SET_CHARSET_NAME,OPT_CHARSET_NAME,
REPORT_DATA_TRUNCATION,OPT_REPORT_DATA_TRUNCATION,
defaultStatementResultType,OPT_NAMED_PIPE

沒有留言:
張貼留言
請提供您的寶貴意見 ;-)